| How to Make Braided Bracelets Posted: 31 Mar 2019 01:00 AM PDT Braided bracelets are a great way to take your outfit to the next level. They are chic and trendy, and also fun and easy to make. Once you know the basics of making braided bracelets, you can experiment with using different numbers of cord or adding charms and beads. EditCreating a Double-Strand Braided Bracelet - Cut 6 strands of cord, 2 in each color. Choose 3 colors for your bracelet, such as pink, purple, and magenta. Cut 2 strands of each color, making sure that they are all the same length. The strands should be about long.[1]
- For best results, use 1.4-milimeter Chinese knotting cord. Rattail cord will also work well.
- Embroidery thread or embroidery floss are not recommended because they are too thin.
- Knot the strands together, then tape them to your desk. Gather all of your strands together, making sure that the ends are aligned. Measure down from the top of your gathered strands. Next, treating the strands as a single rope, tie them into an overhand knot.[2]
- An overhand knot is where you wrap the rope into a loop, then push the end through the loop.
- Make sure that the knot is below the tape. There is enough length in the tails to prevent the braid from sliding out.
- Separate the strands based on color. Divide the strands into 3 groups, keeping the colors together. For example, if your color scheme was pink, purple, and magenta, you'll have 2 pink strands on the left, 2 purple strands in the middle, and 2 magenta strands on the right.[3]
- You will be creating a basic 3-strand braid. Treat the 2 strands of each color as a single strand.
- Cross the 2 left strands over the middle strands. Treating the 2 left strands as a single strand, pick them up, and cross them over the middle strands. They are now your new middle strands. Make sure that the 2 strands are flat and not twisted.[4]
- Cross the 2 right strands over the new middle strands. Take the 2 strands on the right, and cross them over the new middle strands. Keep them together and make sure that they aren't twisted.[5]
- Tighten the strands. Gently tug on your outer strands so that the cross-over point scoots towards the knot at the top of your braid. Make sure that the tension is distributed evenly between the strands. You don't want 1 strand to be tight and have another so loose that it sticks out.[6]
- Repeat the process until the bracelet is the length you want it. Continue to cross the left 2 strands and the right 2 strands over the middle ones. After each set of cross-overs, gently tug on the strands to tighten them. Keep braiding until the braid is long enough to wrap loosely around your wrist.[7]
- Remember to treat the 2 strands of each color as a single strand.
- Knot the end of the bracelet, then cut the rest off. Treating all strands as a single rope, wrap them into a loop, then pull the tail through the loop. Slide the knot towards the end of the braid while tightening it. Cut the tails until they are long.
- Skip this step if you'd like to make an adjustable closure. Click here instead.
- Remove the tape, then tie the ends together. Peel the tape off of the desk first. Wrap the bracelet around your wrist, then ask someone to tie the 2 tails together. Trim off the excess tails, if desired.
EditCreating a 5-Strand Braid - Cut 5 pieces of cord that are all the same length. It would be easier if you used 5 different colors, or 5 different shades of the same color. If you are an experienced braider, however, you can use fewer colors. The strands need to be 2 to 3 times your wrist circumference.[8]
- If you want a wider bracelet, cut 2 strands of each color. Treat the pairs as a single strand for the rest of the tutorial.
- 1.4-milimeter Chinese knotting cord will work the best, but rattail cord may also work.
- Alternatively, you can use embroidery thread instead. It is not the same thing as embroidery floss. Instead of being made up of separate strands, it is twisted like a thin rope.[9]
- Knot and tape the strands to your desk. Gather all of the strands together. Make sure that they are aligned, then treating them as a single rope, tie them into an overhand knot, from the end. Tape the knot to your desk.[10]
- The knot needs to be below the tape. The tails are long enough to prevent the braid from sliding out.
- Spread the strands out, with 3 on the left and 2 on the right. Spread the strands out on the desk. Create a large gap in the middle of the strands. Make sure that you have 3 strands on the left and 2 strands on the right.
- The exact width of the gap does not matter. It needs to be wide enough to distinguish it from the spaces between the other strands.[11]
- Again, if you cut 2 strands of each color, treat them as a single strand and group them together.
- Weave the outermost left strand towards the gap. Take the first strand on the left. Weave it under the second strand and over the third. Stop when you reach the gap.[12]
- Repeat the process for the outermost right strand. Take the last strand on the right. Weave it under the second-to-last strand, and over the next one. Take a moment to straighten and tighten the strands.[13]
- Continue to weave the outermost strands under and over to the middle. Work your way across the braid until you get the length you want. Every so often, tug on the strands to tighten them and straighten them out. You want the tension to be even; you don't want 1 strand to be tight and another loose.
- Knot the end of the bracelet once you get the length you want. Continue to braid the bracelet until it is long enough to wrap loosely around your wrist. Gather all of the strands together, and wrap them into a loop. Pull the tails through the loop, then tighten the knot right above the braid.
- Skip this step if you'd like to make an adjustable closure. Click here instead.
- Trim the tails to 5 inches, then tie the ends together. Cut the excess string down to . Peel the tape off, then wrap the bracelet around your wrist. Ask someone to tie the 2 together into a secure knot. Cut off the excess tails, if desired.
EditCreating a Mixed-Media Bracelet - Find 3 strands of ribbon or chain. A basic braid consists of 3 strands woven together, but there are no rules as to what those strands have to be made from. Find 3 strands of ribbon, string, or chain. They can be all different, or you can have 2 be the same. Here are some ideas:[14]
- For a trendy look, use 2 suede ribbons and a thin chain.
- For a vintage look, use 1 velvet ribbon, a thin chain, and lace trim.
- For a bohemian look, cut 2 different types of fabric into wide strips. Use a thin chain or suede ribbon for the third strand.
- Cut the strands until they are all the same length. Wrap a measuring tape loosely around your wrist, then triple that measurement. Cut all 3 of your strands down to that length.[15]
- Use fabric scissors for fabric strands, including ribbon and lace.
- Use sharp scissors for non-fabric strands, including pleather and suede.
- Use wire cutters for chains.
- Secure fold-over cord ends to fabric suede strands. You will eventually slip the ends of your strands over a jump ring. You can do this easily with a chain, thanks to the loops, but you can't do it with fabric, string, or suede strands. Buy a pack of fold-over cord ends from the beading section of a craft store, then do the following:[16]
- Slide the end of your strand into the cap of the fold-over cord end.
- Use heavy-duty pliers to clamp the cap shut.
- Don't do the other end yet. You may need to cut the strands shorter.
- Repeat the process for the other strands.
- Gather the ends together and tape them to your desk. Gather all 3 strands together. Make sure that the ends all match up, then tape them to your desk. Make sure that the tape is strong enough to hold the strands; a piece of masking tape will work especially well here.
- Braid the strands until the braid is the length you want. Cross the left and right strands over the middle strand. Tug on the strands to tighten them, then repeat the process until the braid is long enough to wrap loosely around your wrist.[17]
- Keep the strands flat for a nicer finish. This is especially important for velvet strands, which have a fuzzy and non-fuzzy side.
- Cut off the excess, then add the remaining fold-over cord ends. Use the same tools as before to cut off any excess ribbon, lace, or chain. Slip fold-over cord ends over ribbon, lace, fabric, or suede cords, just like before, and clamp them shut.
- Open up a jump ring. Pinch 1 half of a jump ring between your thumb and index finger. Pinch the other half of the jump ring with a pair of pliers. Make sure that the seam in the jump ring is facing up. Pull the pliers away from you and your fingers towards you until the seam widens.
- Slip the ends of the strands over the jump ring. Find the end of your chain, if you are using it, and slip it over the jump ring. Slide the ends of the fold-over clamps over the jump ring too.[18]
- Fold-over clamps have a tiny loop at 1 end.
- Close the jump ring using the same technique you used to open it. Pinch the jump ring between your fingers and pliers. Move the pliers towards you until the jump ring closes. If there is a gap in the seam, use the pliers to pinch it shut.
- If the jump ring is very small, you may have to hold it between 2 pliers instead of your fingers and 1 pair of pliers.
- Repeat the process to add a lobster claw clasp to the other end. Remove the piece of tape sticking your bracelet to the table. Open up the jump ring on the end of your lobster clasp. Slide it through the loops at the ends of your chains and fold-over ends, then close it.[19]
EditCreating an Adjustable Closure - Complete a braided cord bracelet. This method only works for bracelets made from Chinese knotting cord, rattail cord, or embroidery thread. It will not work for mixed-media bracelets. The bracelet needs to be long enough to wrap loosely around your wrist. Do not cut or tie the bracelet off.
- Tie 1 of the outer strands around the rest. Find 1 of the strands on the outside edge of your bracelet. Wrap it around the other strands to create a loop, then pull it through the loop. Pull on the strand to tighten the knot.[20]
- It does not matter if you use the left or right outside edge.
- Use the same cord to create a second knot. Take the same cord you just used to wrap around the other cords. Wrap it around the other cords a second time to create a loop, then pull it through the loop. Tug on the strand to tighten the knot.[21]
- Cut the remaining strands, then seal them. Use a pair of scissors to cut the other strands as close as possible to the knot. Do not cut the strand you used to make the knot. Seal the cut ends as follows:[22]
- Chinese knotting cord or rattail cord: hold the cut ends over a flame until they melt.
- Embroidery thread: place a drop of liquid glue over the ends, and let the glue dry. Super glue will work the best, but you can use tacky or fabric glue.
- Repeat the process for the beginning of the braid. Remove the piece of tape first. Undo the knot, then tie 1 of the outer strands around the rest 2 times. Cut the other strands and seal them. Do not cut the strand you used to make the knot. The beginning and end of your bracelet should look the same.[23]
- Try to use a different color for the knotting cord than you did for the end of the cord. This will make the next step easier.
- Tie the first cord around the second cord 2 times. Take the first cord at the end of your braid. Measure along it, then wrap it around the second cord. Pull the tail through the loop to tighten the knot. Make sure that the knot is from the end of the braid, then create a second knot.[24]
- Make sure that the braid is not twisted for this step.
- Do not use the second cord from the beginning of the braid to make the knot. You should be able to slide the knot along the cord.
- Cut the cord close to the knot, then seal the end. Take the rest of the cord you just used to make the knot. Cut it as close as possible to the knot. Seal the cut end using the same method as before:[25]
- Chinese knotting cord or rattail cord: candle or lighter flame.
- Embroidery thread: liquid glue.
- Slide the knot towards the beginning of the braid. You should be able to slide the knot up and down along the second cord. Slide the knot towards the base of the second cord so that it bumps up against the beginning of the braid.[26]
- Repeat the knotting process with the second cord. Measure along the second cord. Wrap the second cord around the base of the first cord, right next to the end of the braid. Tie the cord into a knot twice, using the same method as before. Cut the excess cord, and seal the knot, just like before.[27]
- Pull on both knots to open and close the bracelet. Slide the knots along the cords to move them. The closer you move the knots together, the wider the bracelet will become. The further you move the knots from each other, the smaller the bracelet will become.[28]
- Keep knots from coming loose by sealing them with glue or clear nail polish.
- You can use cords that are all the same, but it will be harder to tell them apart.
- Experiment with other types of cording, such as suede.
- Add large seed beads to the outer strands of a basic braid before each cross-over.[29]
EditThings You'll Need EditCreating a Double-Strand Braided Bracelet - Chinese knotting cord or rattail cord, 3 different colors
- Tape
- Measuring tape
- Scissors
EditCreating a 5-Strand Braid - Chinese knotting cord, rattail cord, or embroidery thread, 5 colors
- Tape
- Measuring tape
- Scissors
EditCreating a Mixed-Media Bracelet - 3 different strings (ribbon, lace, suede, chain, etc.)
- Fabric scissors (for ribbon and lace)
- Shape scissors (for suede and pleather)
- Wire cutters (for chain)
- Fold-over cord ends (for ribbon, lace, and suede)
- Heavy-duty pliers
- Needle-nose pliers
- Jump ring
- Lobster clasp
EditCreating an Adjustable Closure - Completed braided bracelet
- Scissors
- Candle/lighter or liquid glue
EditRelated wikiHows EditReferences EditQuick Summary
Cite error: <ref> tags exist, but no <references/> tag was found
|
| How to Dye Candles Posted: 30 Mar 2019 05:00 PM PDT There's only one thing that could make your favorite candle even better—if it were your favorite color, too! Dyeing your candles allows you to customize them to suit any set of sensibilities. Start by melting an old candle or two on the stovetop in a double boiler, or use a block of paraffin wax to make your own candles from scratch. Add a small amount of powdered or liquid candle dye, stirring in more pigment gradually until you achieve the desired shade. Once the wax is just the right color, pour it into an empty mold complete with a new wick and allow it to harden before burning. EditMelting the Wax - Pick out an old candle to upgrade. White and other light shades will allow the dye to show up better, yielding the most vibrant results. Since you'll be melting them down, it will be easiest to work with plain container-less candles. If the candle you want to use is in a jar and tin, use a butter knife to scrape out the wax in chunks.[1]
- You can use multiple smaller candles to create one big candle, as long as they're all made from the same type of wax.
- The candle you choose should not contain any other decorative elements, such as flowers, seashells, or glitter.
- Avoid using scented candles. Melting these down can affect the perfumes that have been added to the wax, causing them to take on an unpleasant fragrance.
- Buy a few blocks of paraffin wax to make your own candles. If you'd prefer to mold a new candle from scratch, purchase a package of paraffin blocks. Paraffin is one of the easiest varieties of wax to melt down and recolor. Raw wax and other candle-making supplies can usually be found at arts and crafts stores.[2]
- Soy or beeswax chips may also be available, if you're particular about the type of wax you use.
- While you're doing your shopping, make sure you pick up enough uncut wicks for each candle to have at least one.
- Set up a double boiler to heat the wax. If you don't own a double boiler, fill a large pot halfway up with water and begin warming it over medium-high heat. Then, situate a second heat-safe container, like a glass mixing bowl or measuring cup, inside the first so that it hovers just above the water bath. The pot will transfer heat to the smaller container without letting it get too intense.[3]
- You can also use a metal coffee can or similar container if you'd rather not have to clean candle wax out of your cookware later.
- Never expose wax to direct heat. This could ruin its natural consistency or even cause a fire![4]
- Cut the candles or wax blocks into pieces. Use a sharp knife to break the wax up into 1-inch (2.5-cm) cubes or shavings. This will increase its overall surface area, helping it melt faster. The smaller the pieces, the less time it will take for the wax to liquefy.
- Set the candles or blocks on a cutting board to avoid scarring your work surface.
- Be careful when handling the knife. Candle wax is an oily substance, which means it may be a little slick.
- Add the wax to the boiler. Place the cut-up candle you want to dye into the smaller container hovering above the water bath. If you're using raw paraffin, drop in 2-5 blocks, depending on how many candles you want to make and how big you intend them to be. These can also be cut into more compact pieces to speed up the melting process.[5]
- 2-2.5 blocks of paraffin can be used to make a standard jar candle, while 5 blocks will produce an oversized candle closer in dimension to a quart-sized milk carton.
- Melt the wax down to a liquid. Stir the semisolid wax periodically to break up lumps. It will typically begin to soften within about 5 minutes and liquefy completely in 8-10. By the time it melts, it will have become thin, transparent, and totally smooth. This is how you'll know it's ready to accept the dye.[6]
- Use a thin, disposable utensil like a wooden dowel or popsicle stick to do your stirring.
- It may take 2-3 minutes longer for the same quantity of a harder wax like paraffin or beeswax to melt completely.
EditAdding Color - Purchase a suitable candle dye. Many candle companies sell liquid dyes that are specifically designed to be used with their products. Other all-purpose dyes will successfully color almost any candle. The important thing is that you choose an appropriate dye for the type of wax you're working with. Otherwise, it may not blend properly.[7]
- Powdered dyes and pigments, such as Rit Dye, can be useful for dyeing candles.
- Avoid ordinary liquid dyes like food coloring. When combined, the watery dye and oily wax will separate, producing an unsightly splotchy effect.[8]
- To keep things simple, you can even use crayons. Since both the candle and the crayon are made of wax, they'll blend like a dream.
- Add a small amount of dye to the melted wax. Squeeze in a few drops, or shake in 2-3 teaspoons if you're working with a powdered dye. Be careful not to oversaturate the wax—candle dyes tend to be extremely concentrated, so a little bit goes a long way.[9]
- The exact amount you use will depend on the size and number of candles you're making, as well as the depth of color you're aiming for.
- Dyeing with crayons couldn't be easier. Just peel off the paper label, drop in as many pieces of the crayon as needed, and stir![10]
- Stir the dyed wax thoroughly for 2 minutes. Keep your stirrer moving slowly and continuously through the melted wax. This will ensure that the dye gets distributed evenly. Once the color is uniform throughout, stop and determine whether it's dark enough for your liking.[11]
- Try not to stir too fast, or you could end up splattering wax all over your work area.
- Add more dye gradually until you achieve the desired color. The more you use, the bolder and more vibrant the finished candle will be. Creating darker shades like hunter green or navy blue may require you to use double or even triple the amount of dye that you ordinarily would. Remember to stir constantly while pouring in the pigment.
- A good rule of thumb for estimating how much dye to add is to multiply the total batch size by 0.05%. To color of wax, for example, you would need to use 0.227g of dye.[12]
- Allow the wax to cool to . When you're satisfied with the quality of the color, turn off the boiler and remove the melting container from the heat. The wax will need to cool slightly before it can be poured into the new mold. Use a kitchen thermometer to test the temperature of the wax as it sits.[13]
- Pouring wax at temperatures higher than about may cause frosting or shrinkage, or even shatter glass containers.[14]
EditPouring the New Candle - Select a container for the new candle. If you're dyeing an old candle, the easiest option is to simply reuse the original jar. However, almost any type of container will work, provided it's heat-safe, has an open mouth, and is large enough to hold the melted wax. Metal cans, shot glasses, tea cups, and mason jars can all make great DIY candle molds.[15]
- Use gelatin molds or empty tea light holders to pour multiple miniature candles.
- To make free-standing candles with the wax exposed, try cutting the top off of a quart-sized milk carton. You can then tear the cardboard away once the wax has set.[16]
- Position the wick in the empty mold. Take an uncut wick and tie one end around a wooden dowel or pencil. The opposite end should be just long enough to reach the bottom of the container. Set the dowel over the open mouth so that the wick is perfectly centered and hanging straight down.[17]
- A wooden clothespin or strip of tape can also make a decent wick holder in a pinch.[18]
- To create a double wick for a larger candle, simply tie a second wick away from the first.
- Pour the wax into the mold. To keep from making a mess, it may help to grab a funnel or transfer the wax to a separate container that has a pour spout. Be sure to leave about of space at the top of the mold so there will be room for the melted wax to collect as the candle burns.[19]
- Use leftover wax to make smaller candles, or wait until it dries to scrape it out and dispose of it.
- Allow the wax to set up. It may take up to an hour for the wax to solidify completely. As it does, it will assume the shape of the surrounding container and you'll have a brand new homemade candle in your favorite color. In the meantime, avoid touching the wax. Doing so could leave behind depressions, smudges, or other imperfections.[20]
- Be careful not to disturb the wick while the wax is setting up, as well.
- Placing the freshly-poured candle in the refrigerator or leaving it in another cool area may help speed up the hardening process.
- Trim the wick. Untie or cut the wick from the dowel. Take a pair of scissors and snip the wick about from the surface of the wax. Your new candle will then be ready to light and add a warm glow to any room![21]
- Clipping the wick too short may make the candle difficult to light, while leaving it too long will cause it to burn inefficiently.
- Keep in mind that the candle's original color will affect the final hue. For instance, adding blue dye to a colorless candle will turn it blue, whereas adding blue dye to a yellow candle will cause it to become green.
- It's a good idea to pull on a pair of disposable gloves when working with dyes. It may take a few scrubbings to wash concentrated pigment out of your skin.
- Add a couple drops of oil fragrance to the drying wax for easy scented candles.
- Fill your living space with an assortment of colored candles for all seasons. For example, you could set out muted pastels in the spring and fall, and burn bright, festive colors in the summertime.
- Candles that have been dyed and poured by hand make excellent gifts.
- Keep an eye on your wax the whole time it's on the stove. Accidents happen when you get distracted.
EditThings You'll Need - Old candles
- Raw paraffin, soy, or beeswax (optional)
- Crayons (optional)
- Double boiler (or large pot and smaller heat-safe container)
- Liquid or powdered candle dye
- Uncut candle wicks
- Wooden dowel, clothespin, or tape
- Knife
- Scissors
- Containers of various sizes and materials (for pour candles)
EditReferences
Cite error: <ref> tags exist, but no <references/> tag was found
|
| How to Overcome Doubt in a Relationship Posted: 30 Mar 2019 09:00 AM PDT You and your partner may be blissfully happy before doubt enters the picture. Then, you start to worry if you're really a good match for one another. Is your partner interested in someone else? If you don't resolve relationship doubts, they can ruin everything. Tackle your doubts by first going to the source— your partner— and seeking out the reassurance you long for. EditGetting Reassurance - Communicate your fears. Bottling up your feelings may actually allow the doubt to fester. Let it go by talking about it with your partner. Be candid with them and come out and say what's bugging you.[1]
- You might say, "We never have conversations about the future and it makes me doubt your feelings for me."
- Ask your partner for reassurance. After sharing your fears, ask your partner for support and reassurance. You might want them to remind you how much they love you, or you might want a show of affection, like a hug and a kiss.[2]
- You might ask something like, "I need to hear that I'm your top priority. Can you tell me please?"
- Be cautious of too much reassurance-seeking as it can make you appear clingy to your partner.
- Work together to devise solutions. Determine what about your partner's behavior causes you to feel doubt. Then, put your heads together and figure out ways to work through it.[3]
- For instance, if you feel doubt because your partner keeps putting off important conversations about the future, have a candid talk about that and find a middle ground.
- If doubt rears its head after a nasty fight, try going to couples therapy and learning better conflict resolution skills.
- Talk to each other about how you like to share and receive love. For example, some people like to do things for the person they love to show how they feel, while others like to shower their partner with compliments and declarations of love. Since it's normal for people to have a different "love language," it's important to know how both of you show love so that there aren't misunderstandings.
- Prioritize quality time. Doubt can creep in when couples go through inevitable droughts of quality time and affection. Making more time for bonding and intimacy can help those doubts fade away.[4]
- Compare your schedules and pinpoint a few days or nights per week that you can spend time together one-on-one.
- Make the most of quality time by silencing your phones and letting others know it's couple time.
- Give feedback about your partner's efforts. As your partner tries to modify their behavior and make you feel more secure in the relationship, show appreciation for their progress. Speak up when you see them trying— say, "I noticed you made an effort to call me back as soon as you could. Thanks, babe."[5]
- Express gratitude when your partner does something that makes you feel reassured without you asking. For example, "I appreciated that you texted me when you were going to be late. It reassured me that you'd still make it and that I am important to you."
EditProblem-Solving Your Doubts - Reframe triggering situations that lead to doubt. Notice which situations tend to amplify your doubt. Then, challenge your thoughts about the situation by trying to view it in another way.[6]
- For instance, if your doubt grows when your partner fails to pick up a phone call, reframe it: they might be in a meeting or taking a shower. A missed phone call doesn't necessarily mean they are up to no good.
- Practice thought-stopping when worries pop up. Doubt can interfere with your life and sap your focus and productivity. Mentally tell yourself to "Stop!" the train of thought and distract yourself with an engaging activity.[7]
- Read a book, knit a sweater, or go for a run.
- Question whether there is evidence that supports strong doubts. If a particular doubt is constantly bothering you, it could be your instinct signaling "trouble." Before you take any action, however, look for evidence.[8]
- Maybe your doubts grew after seeing your partner flirting with another person. Can you find any other examples that made you feel uneasy about your partner's "wandering eye?"
- Decide if your doubts are deal-breakers. Some doubt in a relationship is completely normal, but if your doubts stem from frequent lying, cheating, manipulation, or unreliability on behalf of your partner, this may be a sign that you should leave the relationship.[9]
- Healthy relationships don't involve undue control, deception, infidelity or abuse.
- Doubts may also be deal-breakers if you have them because your partner doesn't support your values. If they can't respect what's most important to you, then it may not be the best relationship for you.
- Talk through your doubts with a therapist. If you're unsure about how to move forward with your relationship doubts, consult with a relationship therapist. This professional can help you tease out what's at the core of your doubts and determine if they are healthy or pointing to a problem.[10]
- You may choose to see a therapist on your own first before bringing your partner to a session.
- Ask your family doctor or human resources rep for a referral to see a therapist in your network.
EditThinking More Positively - Identify what makes you worthy outside of your relationship. Make a list of all the reasons you're a great person that have nothing to do with being a part of a couple. Maybe you're super smart, athletic, compassionate about animals, or a talented cook.[11]
- If your self-worth is heavily connected to the health of your relationship, you could experience doubt even during common challenges. You can battle this by building up your self-esteem.
- Use mindfulness to sit with uncertainty. Feeling afraid or unsure isn't great, but some doubt is normal and even healthy. Start a mindfulness practice to help you learn to embrace or at least tolerate the uncertainty in your relationship and your life.[12]
- When these feelings arise, notice them but let them be. Take deep breaths in through your nose and out through your mouth. Don't try to change the thoughts or act on them. Just sit with them.
- Perform mindfulness daily and you'll start to feel more in control and less bothered by these worrisome doubts.
- Stay away from negative or critical people. The opinions of co-workers, friends, and family can lead you to have doubts about your relationship. If a person only ever has negative things to say about your partner or your relationship, take a step back.[13]
- Sometimes, your loved ones may offer advice that is well-meaning, but biased or self-serving. Reflect on how you feel with your partner and what you see in their behavior before allowing others' perspectives to feed your doubt.
- Be wary of taking advice or discussing your relationship with people who are overly judgmental or critical. Choose open-minded and supportive confidantes.
- Drop "should" and "must" from your vocabulary. If your language regarding your relationship is rigid, you're more likely to try to push against uncertainty. When you remove these terms from your vocabulary, you can feel more flexible and open-minded about your relationship.[14]
- For example, if you think, "He should answer the phone whenever I call," you may be inadvertently making yourself angry if your partner is busy when you call.
- Don't say "She must be spending Saturday with someone else" simply because your girlfriend didn't try to make plans with you.
EditTalking to Your Partner EditReferences
Cite error: <ref> tags exist, but no <references/> tag was found
|


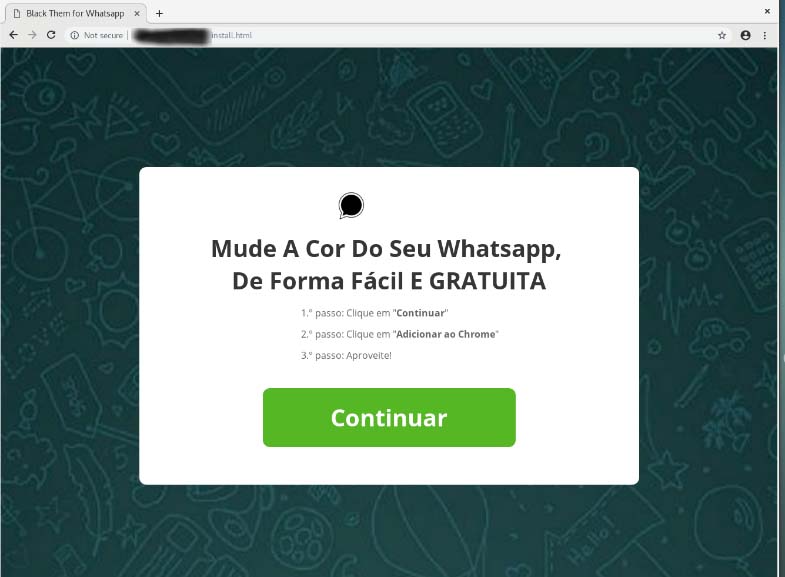 Página tenta convencer usuário a instalar extensão no Chrome para mudar cor do WhatsApp Web
 Página exibida no celular promete liberar função de alterar cor do WhatsApp se usuário compartilhar o link com amigos

 Imagem:
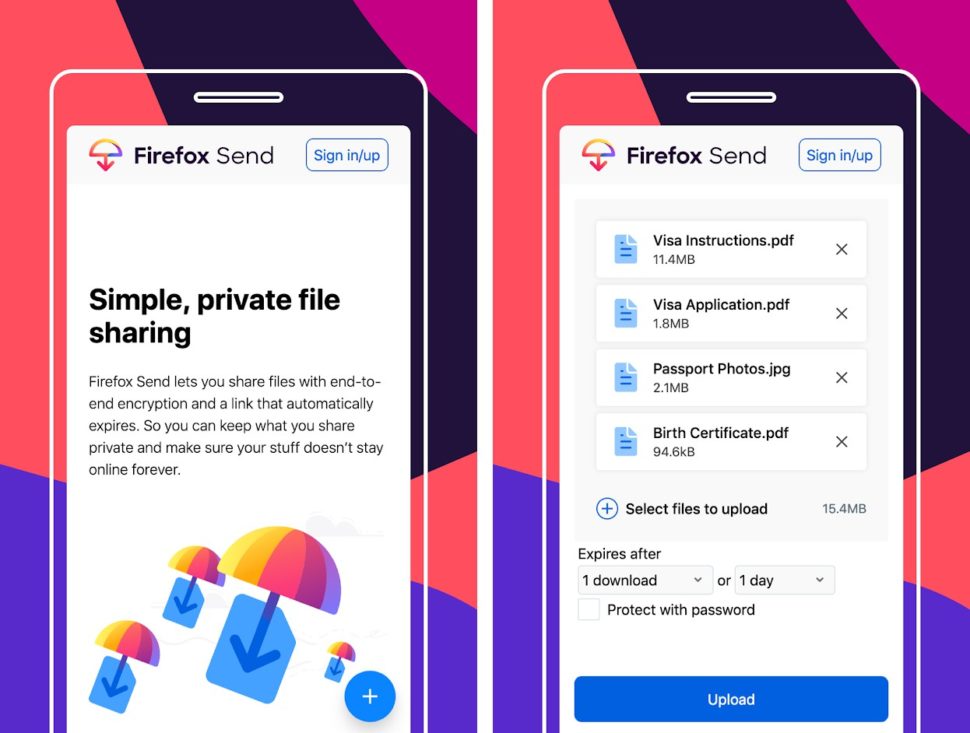 Feito pela Mozilla, o Firefox Send é um compartilhador de arquivos com foco em privacidade. Ele usa criptografia de ponta a ponta para proteger o que você está mandando para amigos, familiares ou colegas de trabalho. O tamanho limite é de 1 GB por arquivo, mas pode subir para 2,5 GB caso você crie uma conta Firefox grátis.
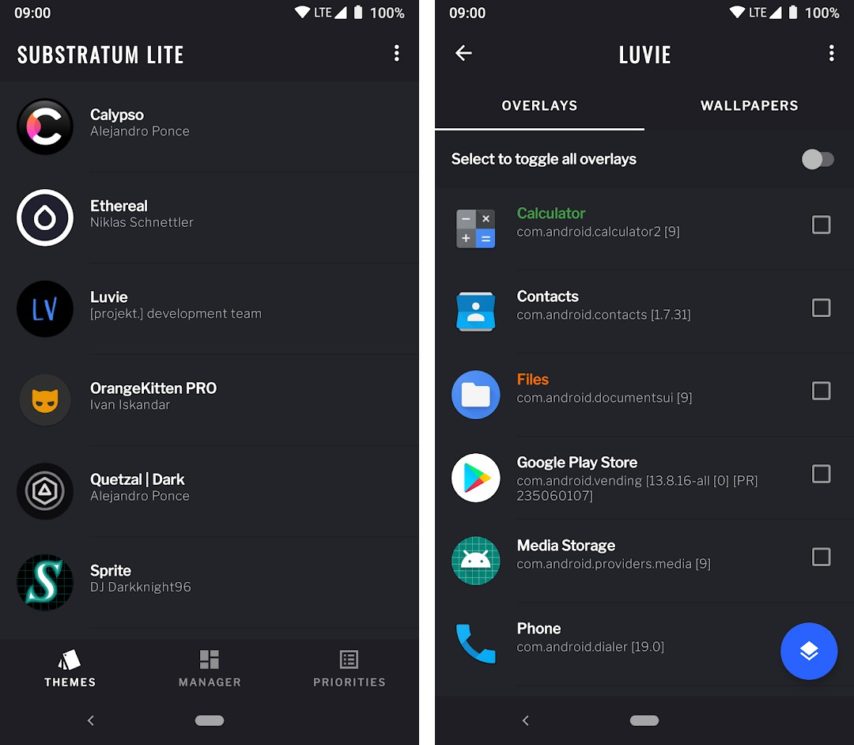 Se você gosta de dar um tapa no visual do seu Android, já deve ter ouvido falar do substratum. O substratum lite theme engine é uma versão mais leve do aplicador de temas. Ele funciona tanto em aparelhos até o Android 8 com root quanto sem root, mas, nesse segundo caso, você precisa do
 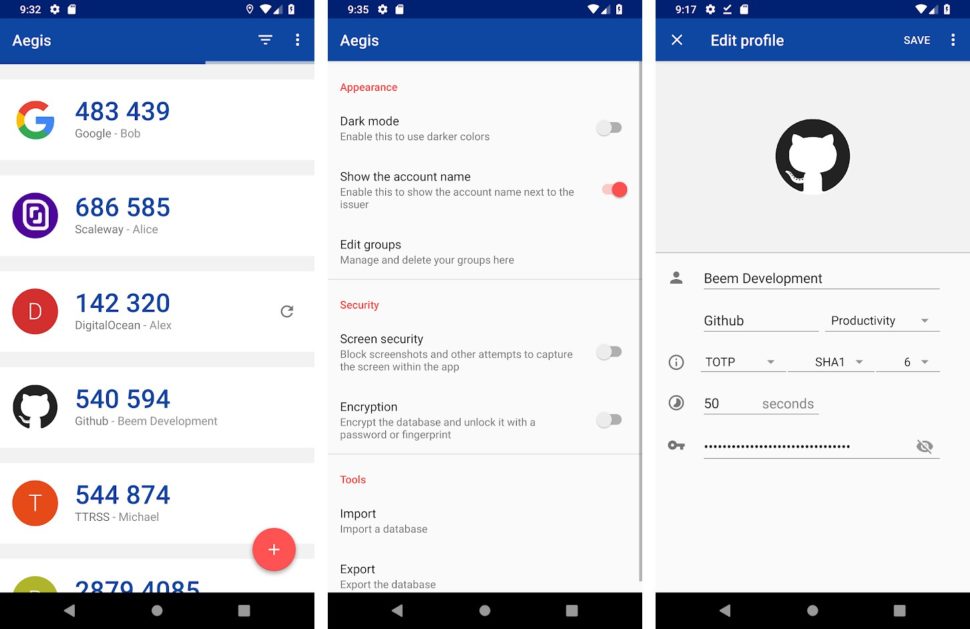 A autenticação por dois fatores é uma das melhores formas de proteger suas contas online. O Aegis Authenticator é um dos melhores apps para obter tokens de diversos serviços, incluindo o Google. Ele conta com alguns recursos extra, como proteção por senha ou impressão digital, tudo para dar ainda mais segurança aos seus dados.
 O Lens Distortions é um app para aplicar alguns efeitos de iluminação e distorção em fotografias. Ele não é um editor completo, mas serve para dar uma cara mais bonita para fotos que já estão boas. Alguns pacotes de filtros precisam ser comprados individualmente, mas você pode ver gratuitamente um preview antes de desembolsar seu dinheiro.
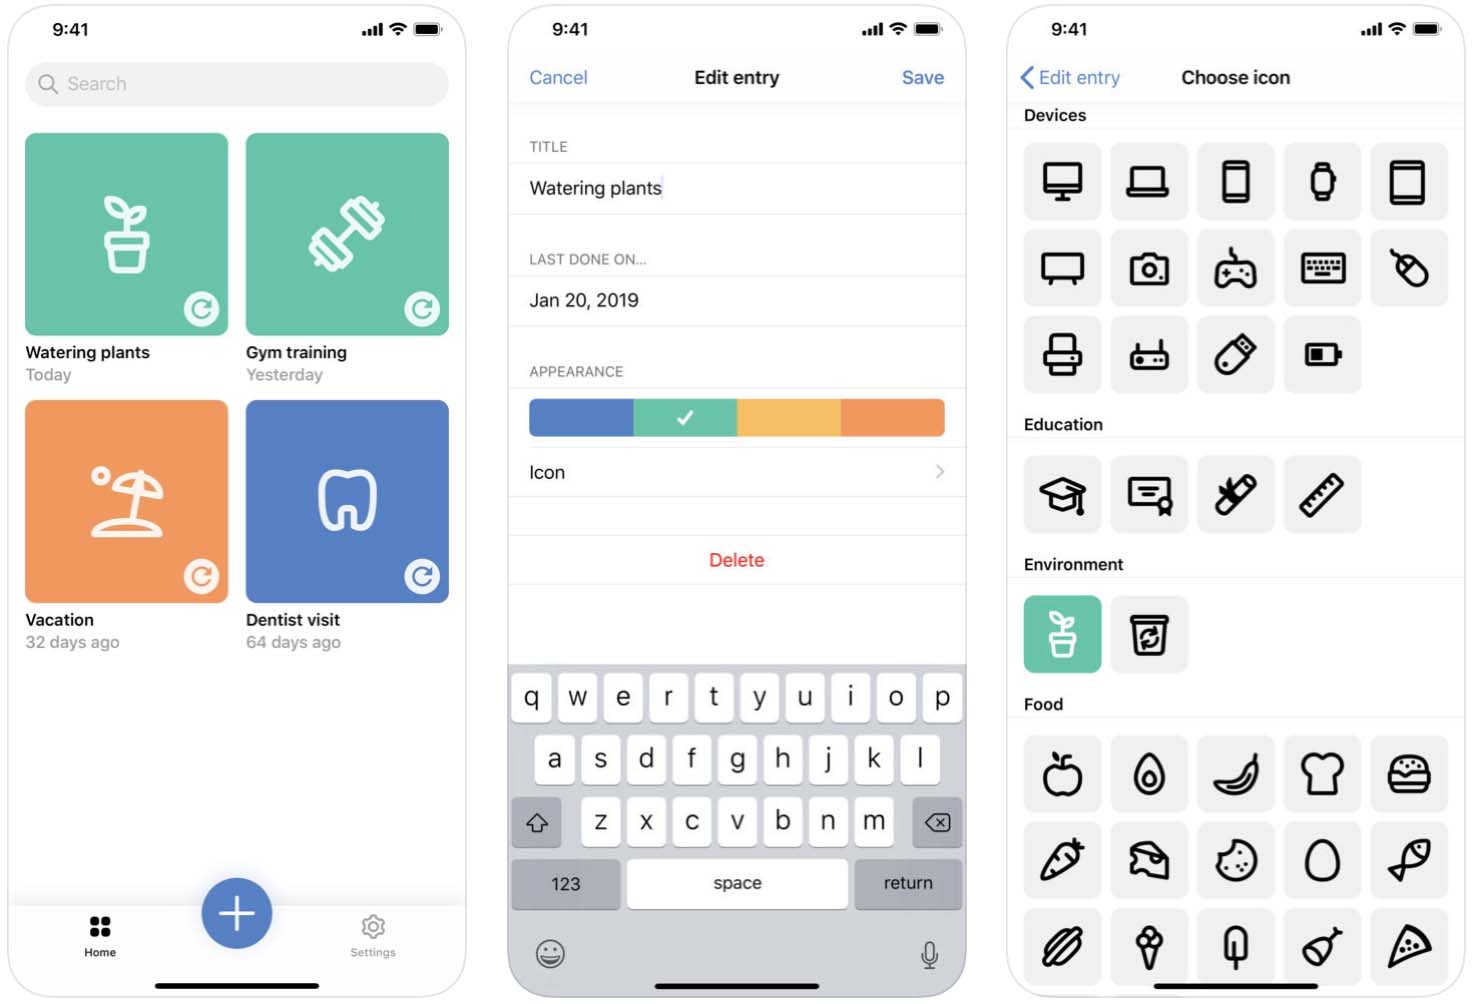 Qual foi a última vez que você regou suas plantas? Ou foi ao dentista? Ter um lembrete visual de quando você realizou determinadas tarefas pode te ajudar a formar hábitos mais saudáveis ou simplesmente lembrar fazer coisas que não vem à cabeça com tanta facilidade no meio da correria do dia a dia. O app The Last Time oferece uma maneira interessante de marcar eventos importantes, também.
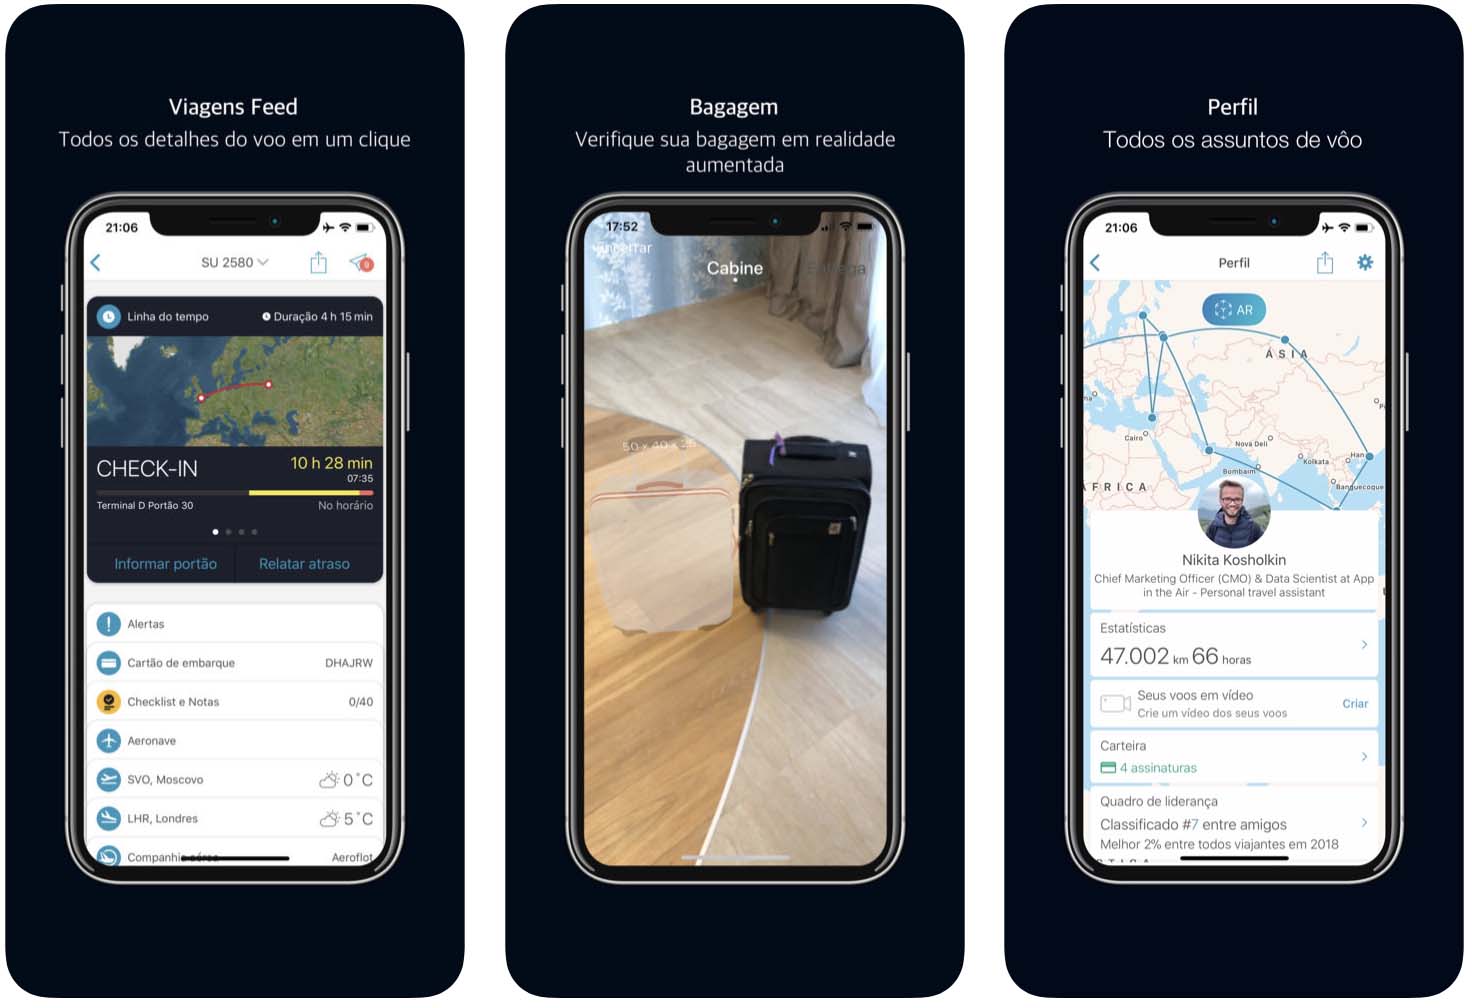 O App in the Air promete ser seu assistente pessoal para viagens, especialmente para as horas em que você está no aeroporto. Ele tem uma espécie de rede social, na qual os usuários publicam dicas. Onde tem tomada? Qual é a melhor cafeteria? Fora isso, ele tem mapas de navegação de diversos aeroportos e funciona offline, te notificando sobre mudanças de portão e atualizações de status de voo por SMS.
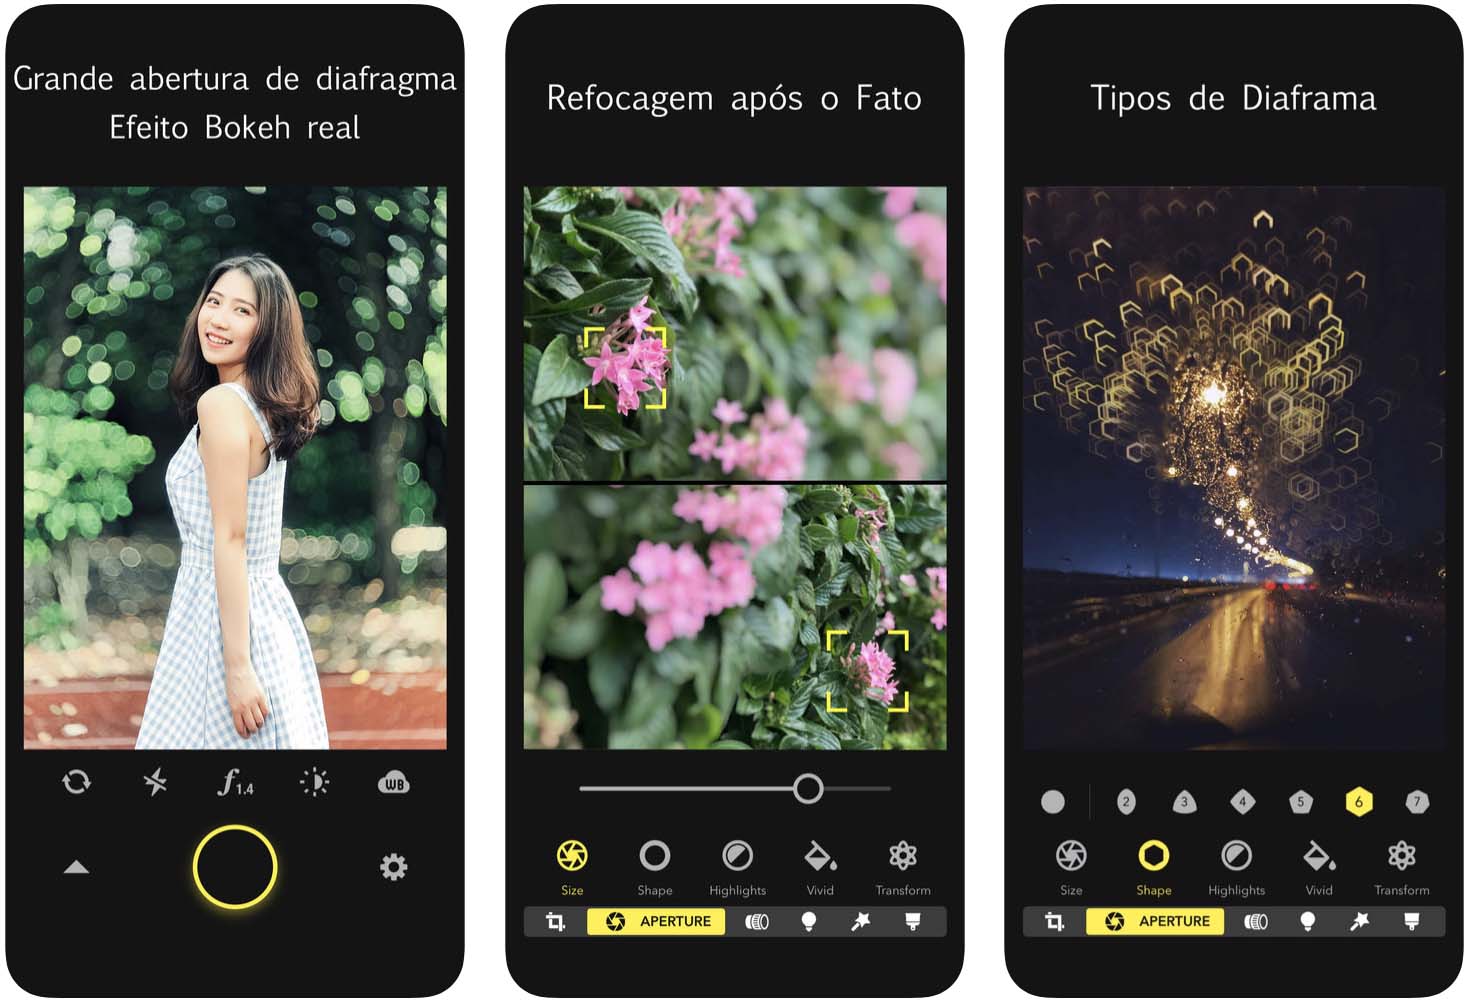 O Focos funciona como um aplicativo de câmera avançada para brincar com o efeito do Modo Retrato do seu iPhone. Ele oferece mais controles de desfoque e conta com editor de fotos incorporado.
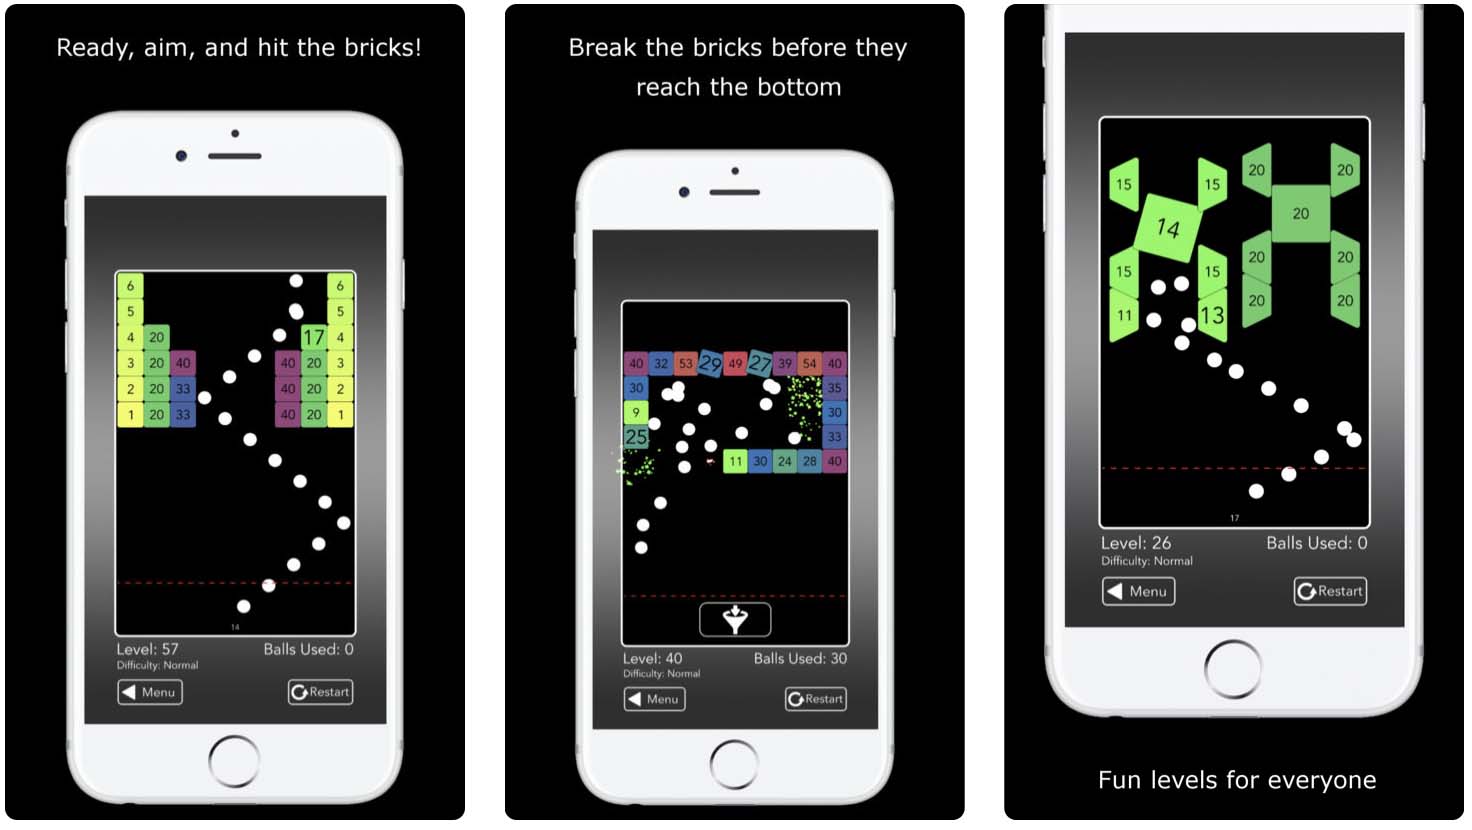 Brick Away é um joguinho arcade para relaxar. Tudo o que você precisa fazer é destruir os blocos antes que eles atinjam a linha pontilhada vermelha na tela. São 200 níveis, três tipos de dificuldade para cada um deles.